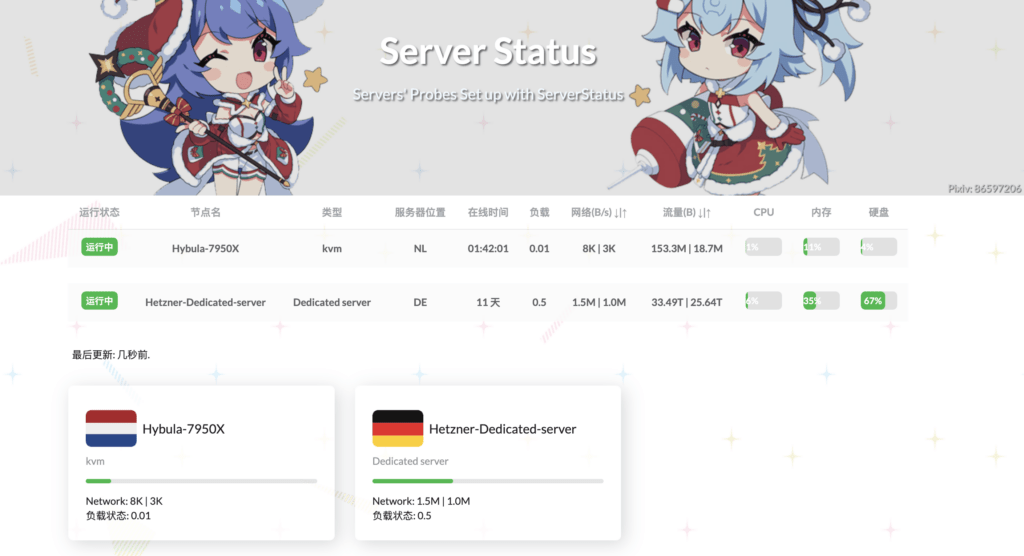
本来探针部署在大阪的Oracle Arm上,无奈号被清退了,只得重新部署
效果

准备资料
-
TG BOT API
-
TG CHAT ID
-
Vercel
-
VPS
-
域名(可选)
搭建服务端
通过@BotFather获得bot_token,红框内指向内容就是你的token

通过@Get My ID获得chat_id

服务端部署
1
2
3
4
5
|
apt install wget curl unzip vim
新建目录并且进入
mkdir -p /opt/ServerStatus && cd /opt/ServerStatus
编辑.sh文件
vim server.sh
|
如果是部署到ARM架构,记得按照注释修改OS_ARCH变量,文件内容如下:
 1
 2
 3
 4
 5
 6
 7
 8
 9
10
11
12
13
14
15
16
17
18
19
20
21
22
23
24
25
26
27
28
29
30
31
|
#!/bin/bash
set -ex

WORKSPACE=/opt/ServerStatus
mkdir -p ${WORKSPACE}
cd ${WORKSPACE}

# 下载, arm 机器替换 x86_64 为 aarch64
OS_ARCH="x86_64"
latest_version=$(curl -m 10 -sL "https://api.github.com/repos/zdz/ServerStatus-Rust/releases/latest" | grep "tag_name" | head -n 1 | awk -F ":" '{print $2}' | sed 's/\"//g;s/,//g;s/ //g')

wget --no-check-certificate -qO "server-${OS_ARCH}-unknown-linux-musl.zip"  "https://github.com/zdz/ServerStatus-Rust/releases/download/${latest_version}/server-${OS_ARCH}-unknown-linux-musl.zip"

unzip -o "server-${OS_ARCH}-unknown-linux-musl.zip"

# systemd service
mv -v stat_server.service /etc/systemd/system/stat_server.service

systemctl daemon-reload

# 启动
systemctl start stat_server

# 状态查看
systemctl status stat_server

# 使用以下命令开机自启
systemctl enable stat_server

# https://fedoraproject.org/wiki/Systemd/zh-cn
# https://docs.fedoraproject.org/en-US/quick-docs/understanding-and-administering-systemd/index.html
|
运行.sh文件:
修改config.toml配置文件,本地修改配置文件参考config.toml
1
|
vim /opt/ServerStatus/config.toml
|
config.toml参考
1
2
3
4
5
6
7
8
9
|
# 管理员账号,不设置默认随机生成,用于查看 /detail, /map
jwt_secret = "" # 修改这个, 使用 openssl rand -base64 16 生成 secret 第8行
admin_user = ""  第9行
admin_pass = "" 第10行
hosts =  第22行
# 开关 true 打开
enabled = false  第60行
bot_token = "<tg bot token>" 第61行
chat_id = "<chat id>" 第62行
|
测试配置文件
1
2
3
4
|
# 测试配置文件是否有效
./stat_server -c config.toml -t
# 根据配置发送测试消息,验证通知是否生效
./stat_server -c config.toml --notify-test
|


重启服务端服务
1
|
systemctl restart stat_server
|
测试访问(ip:8080)

主题配置
通过前后端分离实现主题配置,前端通过Vercel部署
首先forkHinataKato/hotaru_theme_for_RustVersion: The frontend of ServerStatus-Hotaru based on Vue 3.0 (github.com)到自己账户下:

vercel导入该库

直接部署即可,不需要修改任何东西。等待部署完成后打开fork的仓库连接,通过Codespaces修改项目

在仓库根目录创建vercel.json,文件内容如下,将http://xxx.com/改为自己的域名或IP地址:端口,如果支持HTTPS,记得将http://全部改为https://:
 1
 2
 3
 4
 5
 6
 7
 8
 9
10
11
12
13
14
15
16
17
18
19
20
21
22
23
24
|
{
    "routes": [
        {
            "src": "/json/stats.json",
            "dest": "http://ip:端口/json/stats.json"
        },
        {
            "src": "/detail",
            "dest": "http://ip:端口/detail"
        },
        {
            "src": "/map",
            "dest": "http://ip:端口/map"
        },
        {
            "src": "/i",
            "dest": "http://ip:端口/i"
        },
        {
            "src": "/report",
            "dest": "http://ip:端口/report"
        }
    ]
}
|
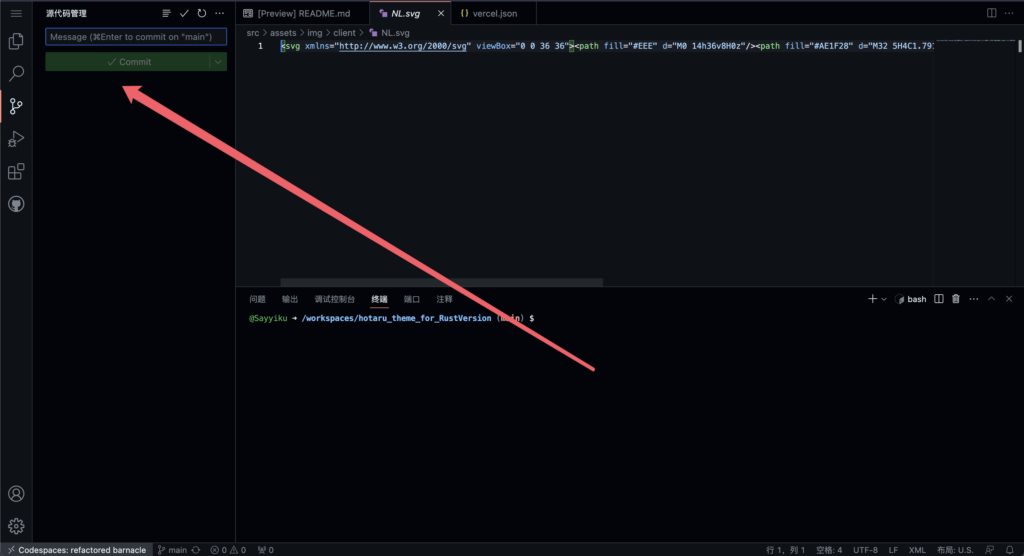
commit推送分支,随意Message

等待重新部署连接后端

添加自己域名

等待下发生效,部署完成
搭建客户端
创建目录
1
2
3
|
cd
apt install wget curl unzip vim
mkdir -p /opt/ServerStatus && cd /opt/ServerStatus
|
编辑.sh文件
如果是部署到ARM架构,记得按照注释修改OS_ARCH变量,文件内容如下:
 1
 2
 3
 4
 5
 6
 7
 8
 9
10
11
12
13
14
15
16
17
18
19
20
21
22
23
24
25
26
27
28
29
30
31
32
33
34
35
36
|
#!/bin/bash
set -ex

WORKSPACE=/opt/ServerStatus
mkdir -p ${WORKSPACE}
cd ${WORKSPACE}

# 下载, arm 机器替换 x86_64 为 aarch64
OS_ARCH="x86_64"
latest_version=$(curl -m 10 -sL "https://api.github.com/repos/zdz/ServerStatus-Rust/releases/latest" | grep "tag_name" | head -n 1 | awk -F ":" '{print $2}' | sed 's/\"//g;s/,//g;s/ //g')

wget --no-check-certificate -qO "client-${OS_ARCH}-unknown-linux-musl.zip"  "https://github.com/zdz/ServerStatus-Rust/releases/download/${latest_version}/client-${OS_ARCH}-unknown-linux-musl.zip"

unzip -o "client-${OS_ARCH}-unknown-linux-musl.zip"

# systemd service
mv -v stat_client.service /etc/systemd/system/stat_client.service

systemctl daemon-reload

# 启动
systemctl start stat_client

# 状态查看
systemctl status stat_client

# 使用以下命令开机自启
systemctl enable stat_client

# 停止
# systemctl stop stat_client

# https://fedoraproject.org/wiki/Systemd/zh-cn
# https://docs.fedoraproject.org/en-US/quick-docs/understanding-and-administering-systemd/index.html

# 修改 /etc/systemd/system/stat_client.service 文件,将IP改为你服务器的IP或你的域名
|
运行.sh文件:
如果需要使用vnstat数据,参考zdz/ServerStatus-Rust: ✨ Rust 版 ServerStatus 探针、威力加强版 (github.com)安装vnstat并配置:
 1
 2
 3
 4
 5
 6
 7
 8
 9
10
11
12
13
14
15
16
17
18
19
20
21
|
# 在client端安装 vnstat
## Centos
sudo yum install epel-release -y
sudo yum install -y vnstat
## Ubuntu/Debian
sudo apt install -y vnstat

# 修改 /etc/vnstat.conf
# 一般来说只要修改BandwidthDetection和MaxBandwidth就够了
# BandwidthDetection 0
# MaxBandwidth 0
# 默认不是 eth0 网口的需要置空 Interface 来自动选择网口
# 没报错一般不需要改
# Interface ""
systemctl restart vnstat

# 确保 version >= 2.6
vnstat --version
# 测试查看月流量 (刚安装可能需等一小段时间来采集数据)
vnstat -m
vnstat --json m
|
在修改配置文件前,可以先试试看自己的服务是否可以使用:(此处域名是你ververl部署的域名,用户名和密码是对应的host)
1
|
./stat_client -a https://probe.catcat.blog/report -u 用户名 -p 密码
|

如果可以使用,就可以修改stat_client.service配置文件了:
1
|
vim /etc/systemd/system/stat_client.service
|
参考如下,只修改ExecStart=/opt/ServerStatus/stat_client这一行,如果是HTTP记得将https改成http,不使用vnstat的话,请删除-n,即只保留-a "https://probe.catcat.blog/report" -u 用户名 -p 密码。
 1
 2
 3
 4
 5
 6
 7
 8
 9
10
11
12
13
14
15
16
17
18
19
|
[Unit]
Description=ServerStatus-Rust Client
After=network.target

[Service]
User=root
Group=root
Environment="RUST_BACKTRACE=1"
WorkingDirectory=/opt/ServerStatus
# EnvironmentFile=/opt/ServerStatus/.env
ExecStart=/opt/ServerStatus/stat_client -a "https://probe.catcat.blog/report" -u 用户名 -p 密码 -n
ExecReload=/bin/kill -HUP $MAINPID
Restart=on-failure

[Install]
WantedBy=multi-user.target

# /etc/systemd/system/stat_client.service
# journalctl -u stat_client -f -n 100
|
修改完成后先重载文件再重启客户端服务:
1
2
|
systemctl daemon-reload
systemctl restart stat_client
|
通过systemctl status stat_client查看服务状态,如下就没问题了


